Immerse players with Unity: add live audio waveforms effortlessly!
Have you ever thought it would be cool to include the live audio waveform of an NPC inside your game and at the same time postpone because…
Have you ever thought it would be cool to include the live audio waveform of an NPC inside your game and at the same time postpone because it would be so difficult? In fact, it’s mind blowingly easy to do so in Unity.

The idea
When I created a podcast talking about managing a small indie studio and interviewing some french stars of such studios, it was right before Covid-19 happened. What caused the majority of gamers go online most of their time, made me go offgrid as there were such poor network where I lived. Obviously I could not record a podcast with both audio and video at that time, so to widen the audience of it, I thought it would be cool to create a video from the audio part only, then integrate a slideshow and adding a sort of live feature in it by including audio waveform of the interviews.
The prototype
I’m more an expert of Unity than any video editing software so it was easier for me to study how doing it inside Unity. And I discovered quickly that creating an audio waveform is quite an easy task. Here are the steps I went through:
- use the audio listener to get the list of values per frequency
- manipulate the values from the list to get values usable in the waveform
- create or update a texture from thoses values to display it
You can get something from it, but it is not what we are used to see when we see audiowaveform since the frequencies increase exponentially and not linearly. By tweaking some of the parameters you can retrieve from the audio listener, I was able to get a pretty good result as you can see below.
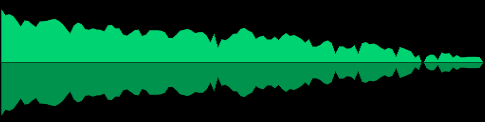
In the image above, as in the sample project, I have added a mirrored image to make it cooler, but what you get is only the bright upper part of the image, it’s up to you to make it look like what you want.
Audio wave configuration
Download and import the project, open the sample scene, press Play and you will see the audio wave form as in the title of this post.
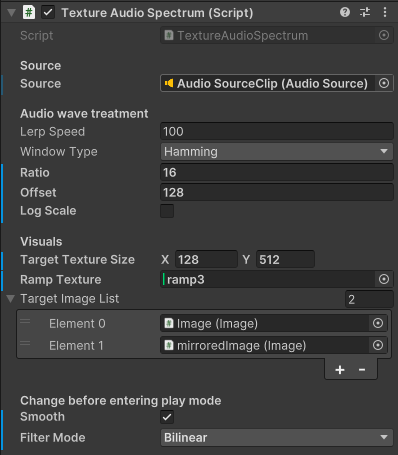
Some parameters are available directly from the audio listener, some others I have added them myself as it was missing to get a pretty result. Here are the explanation for them:
- lerp speed: it can go pretty fast and you won’t see anything if there is no lerp. Depending on your project, you may want to increase of decrease this value. I found that 100ms is a good average.
- window type: I will explain this one in details in the next part.
- ratio, offset and log scale: those are applied to the value you get from the audio listeners to have something visible.
Increase the ratio to expand the range and be able to get taller images. It will press the value below 0 so you have to increase the offset at the same time.
I suggest you always have the log scale checked to get something visible and nice, but you may have a specific project where this is something you want, so it’s up to you.
Visuals configuration
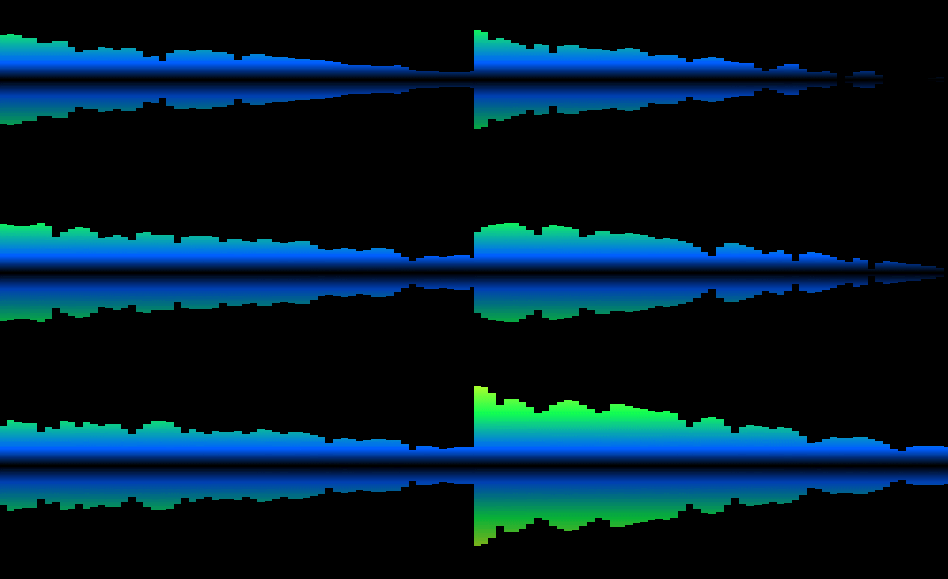
Once you configured the audio wave, you can focus on the ramp texture. I provided some samples for you, so start by assigning them one after another to see what you can do with it: one or multiple color, smooth or not. You also can change the filtering mode of the texture and if you want the frequencies values be smoothen one with the next one.
All those changes must be made outside of Play mode !
If you increase the texture size, it will use more CPU, but you will get a more detailed audio wave form. I usually limited myself to 128x512 to avoid getting too many areas with nothing (depends on the ratio and offset).
Last setting you would like to change is the image list. Those are canvas images and the same texture will be output to all images. In the sampe scene, I created a second image which is inverted on the Y axis and a grey color to darken the result, I like it that way.
Window type
To make it simple, the window type is what allows to study the audio waves using the Fourier transform and filtering the detected frequencies.
The window word is used as we filter out some of the audio wave by focusing on specific parts of the audio wave. This is required to prevent some errors generated by the Fourier transform knowned as spectral leaks. I won’t go into further details here but you can find a lot detailed information on the internet if you want to dig.
Just know that the Hann window type (also known as Hanning window type due to the proximity with the Hamming window type) is good enough in most of cases.
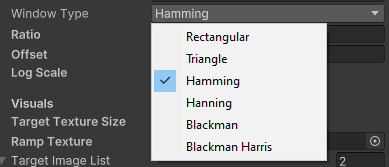
Again, experiment on your project to check the result and select the one that fits your use case.
Conclusion
I wanted to share this asset I made a few years ago because it’s a cool way to visualize audio and I created it because I saw no one else making this simple tool go public.
The project is available here : https://github.com/FredericRP/AudioWaveForm
If you learned something, find it cool or just want to say you read this post until this point, just clap once or twice and it will make me happy!